Looking for ways to put those fabulous Crystal Coast beach finds to good use? Or maybe you’re like many of us who fully intend on making a scrapbook of your last beach vacation, but somehow never get around to doing it. Here are a few fun DIY craft ideas using beach shells, along with some of your favorite vacation photos, and turning those family memories into cherished keepsakes.
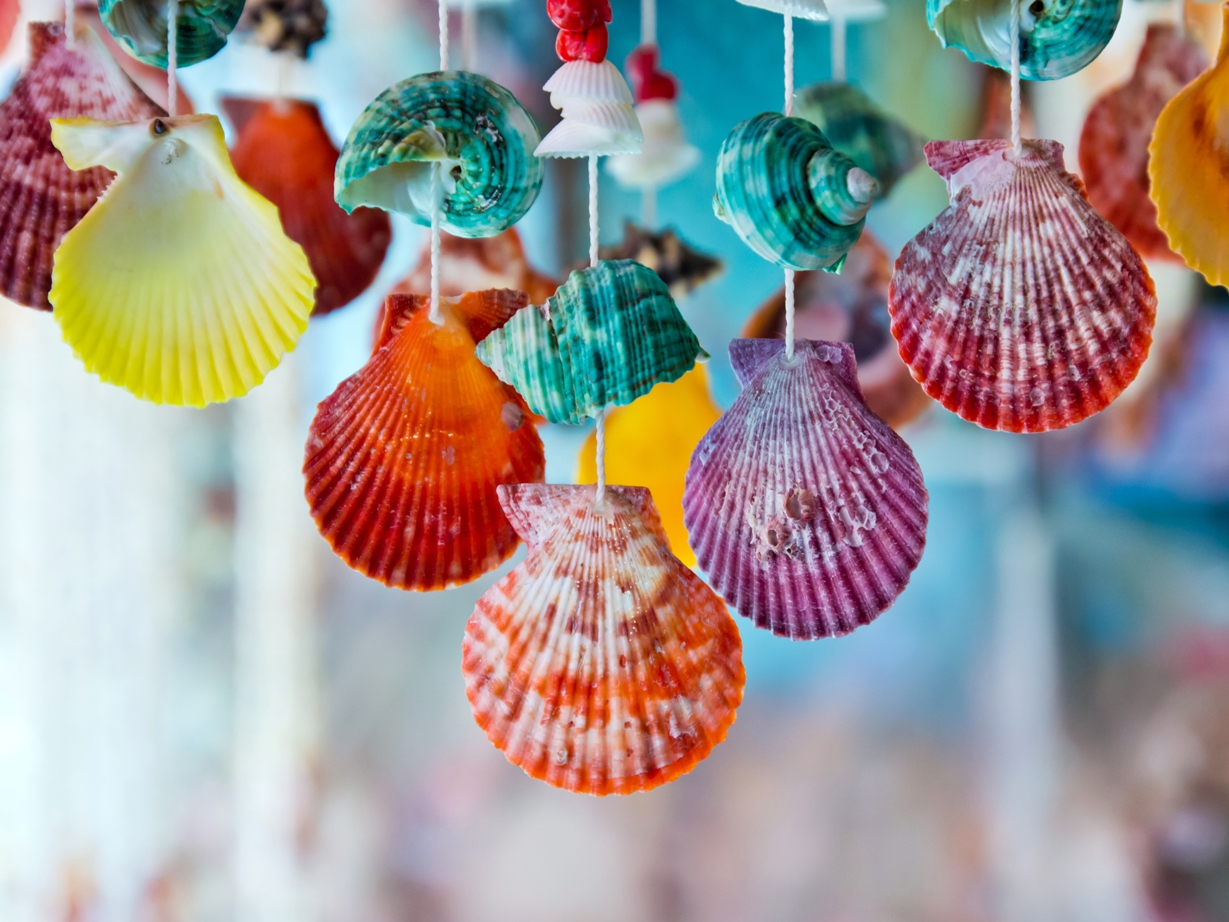
Seashell Windchimes
Any beach vacation means you will be bringing home a bag or bucket of seashells. But don’t let those shells stay tucked away in the back of the closet. Enjoy them all year long by using them to make Seashell Windchimes. Now every time you hear them blowing in the breeze, you will remember those special beach memories.
Materials Needed:
- Old lampshade
- Drill with a small drill bit
- Seashells
- Cotton string (twine)
- Pair of scissors.
Directions:
- Wash your shells to remove any dirt or sand.
- Drill one or two holes in each of your shells just big enough for the string to fit through (make sure your area of the shell you are drilling is lying flat to avoid any breaking).
- Run your string through the shell and knot it off so the shell stays in place.
- Place shells as far or as close as you would like and continue this process throughout your strand.
- Based on how big of a frame you are working with you might want to create at least 8 strands.
- Tie those strands to your upside-down lampshade.
- Hang your wind chime outside and listen to the sound of the shells.
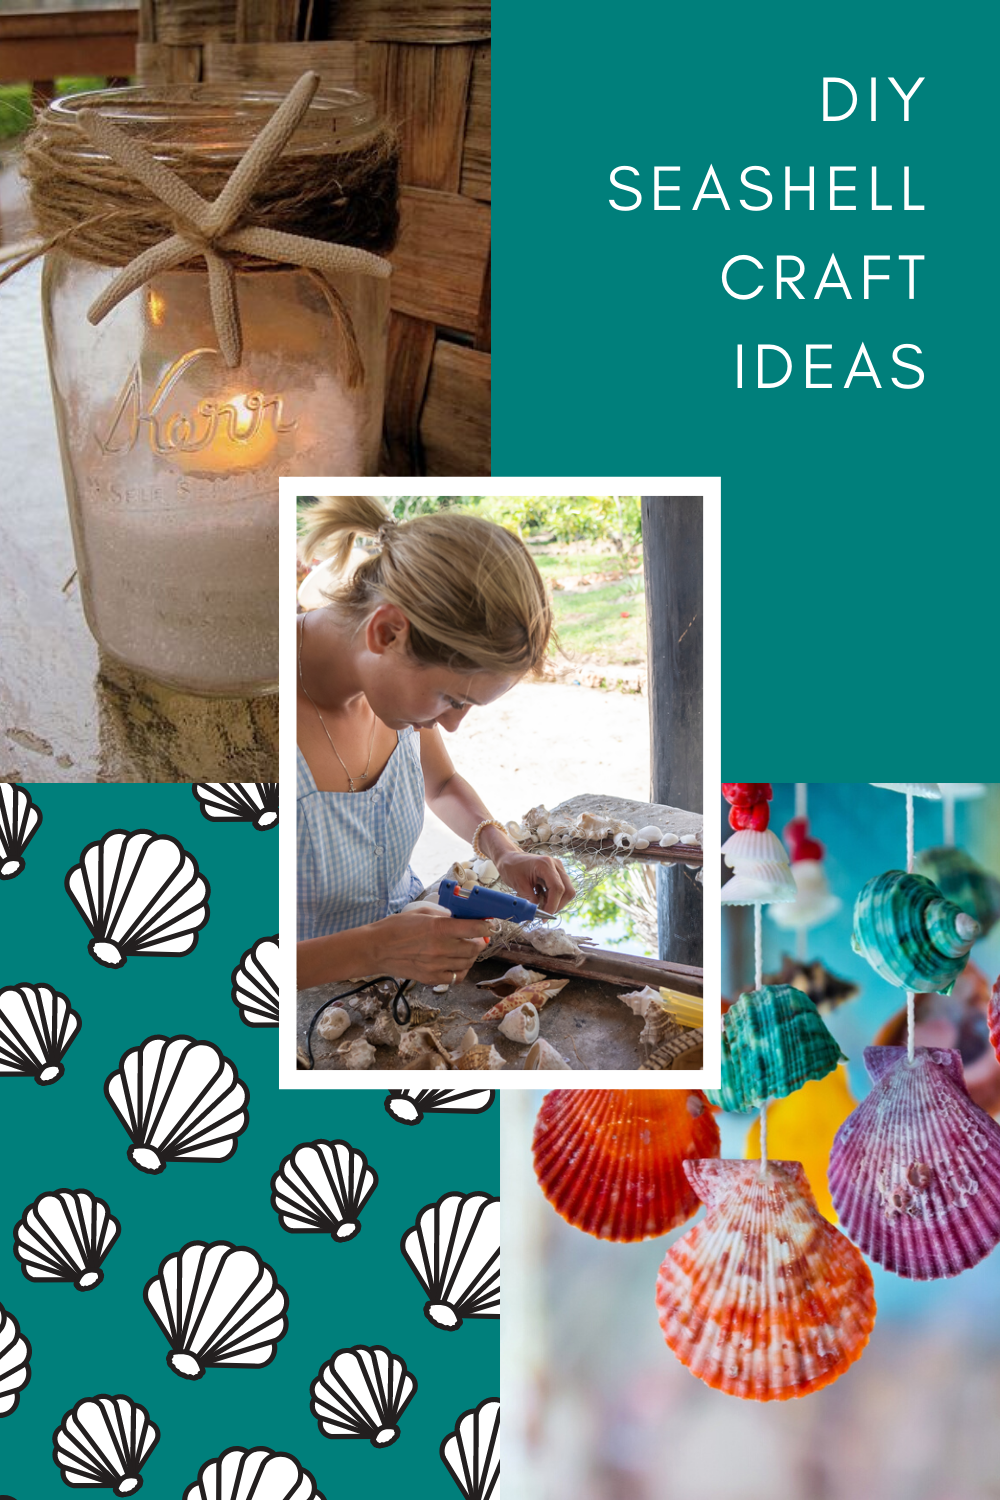
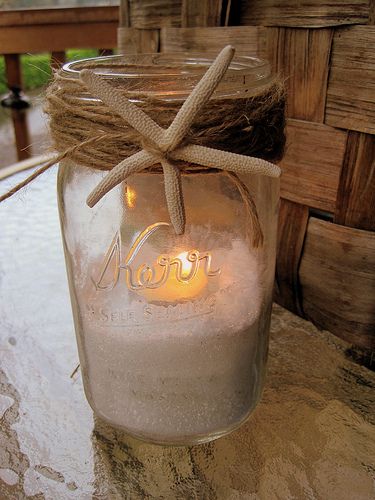
Beach Candle Holder
Who doesn’t love the scent of a good candle? This easy to do home décor project offers another great way to put your seashell collection to use. Create your own unique candle as a reminder of your family’s favorite beach vacation. And you don’t have to stop with just one, these beach candle holders also make great gifts you can give to brighten someone else’s day.
Materials Needed:
- Mason jar
- Sand
- Candle
- Craft rope
- Large nautical focus point (starfish, sand dollar, anchor, etc.)
- Lighter
- Hot glue gun
Directions:
- Fill your mason jar with sand.
- Place your candle in the sand and be sure the amount of sand is securing your candle in place.
- Wrap your craft rope around the rim of the mason jar as many times as you like and tie it off.
- Use your hot glue gun to secure your decorative object in place on the rope.
- Light your candle and enjoy.
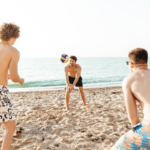
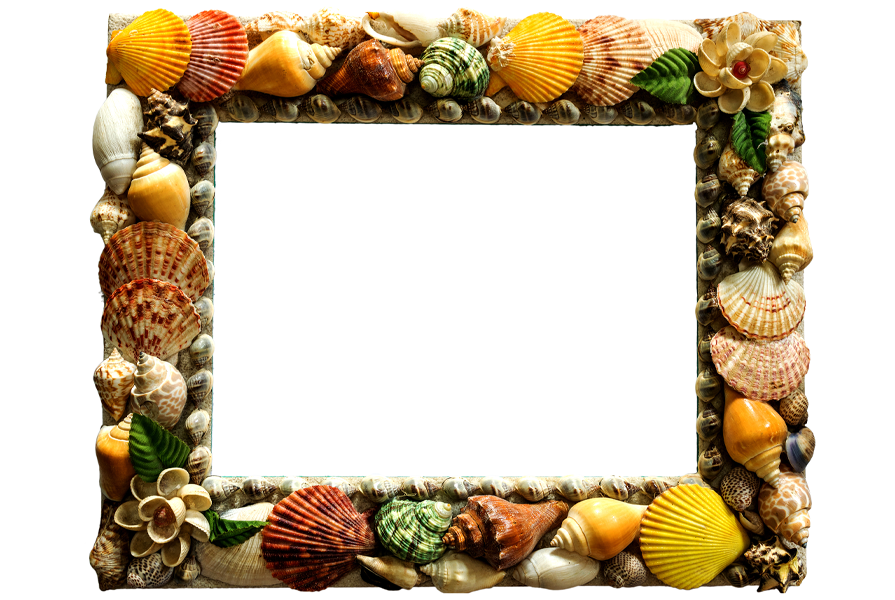
Seashell Picture Frame
This simple seashell craft is the perfect activity to keep the kids occupied on a rainy day and one of the best ways to display those fond memories of past beach vacations. A great part about this project is that any picture frame will work, but to make the process easier, we recommend using a smooth flat frame.
Materials Needed:
- Shells
- Picture frame
- Photograph
- Low-temperature glue gun
Directions:
- Rinse shells with fresh water to remove sand, algae and any other residue. Let dry.
- Arrange shells on picture frame as desired. (TIP: Take a photo to help you remember the shell placement.)
- With the glue gun, carefully apply glue to the bottom of one shell; place the shell on the frame. Continue until all shells are adhered.
- Insert photo into frame.
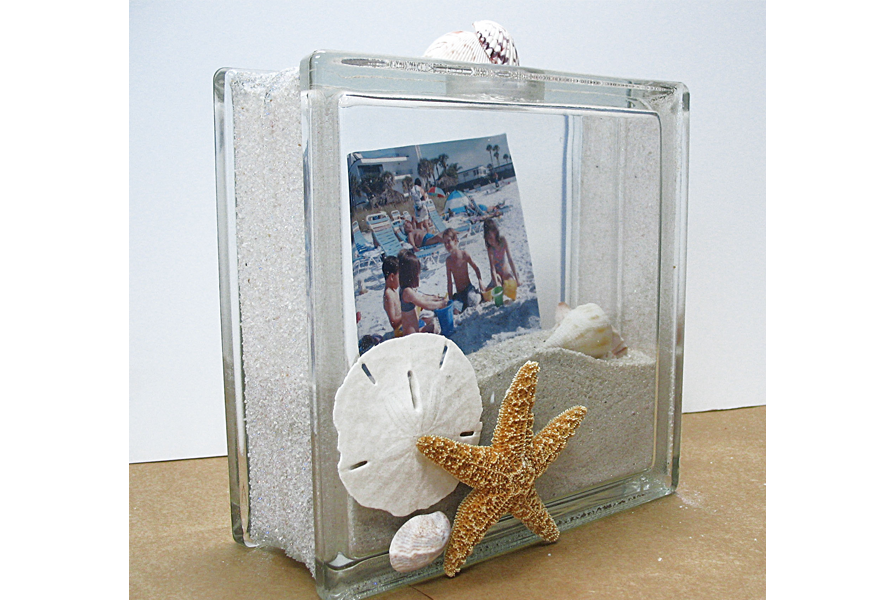
Seaside Shadow Box
Keep your fondest memories of vacations to Emerald Isle alive with this Seaside Shadowbox. This fun project uses a PhotoBox or shadow box as the base. Then you just fill the box with some of your favorite finds and photos taken from those fun adventures along the Crystal Coast.
 Materials:
 Materials:
- 1 shadow box or PhotoBox with cap
- 2 ¼ cups of sand
- Shells
- 1-ounce white glitter
- Mod Podge™
- Foam Brush
- Small 2” x 2” White Foamcore
- Clear-drying adhesive suitable for glass
Directions:
- Clean the box with glass cleaner or a 50/50 solution of vinegar and water. Be sure to completely dry with a cloth.
- Place the box in a vertical position on a newspaper and remove the cap.
- Place ¼ cup of sand in a small container. For glittered-sand, sprinkle 1 tablespoon of glitter in and stir to mix.
- Using a foam brush, apply a coat of Mod Podge™ to the center on the bottom of the box. Using a plastic spoon sprinkle glittered sand over the Mod Podge™ area. Continue this process until all sides of the box are covered with glittered sand. Let that dry for about 20 minutes.
- Lay the box flat and position your shells on the surface of the block. Once your shells are laid out, glue into place and allow to dry.
- To create a shelled cap, take a small piece of foam core and cut to fit inside the cap. With scissors, cut a slit in the edge of the cap. This will help make removing the cap a lot easier.
- Next, layer a shell assortment on top of the foam core. You may need to cut additional small pieces of foam core for added support underneath shells. Glue into place and allow drying. Brush the area around the cap and between the shells with glue and sprinkle with glittered sand.
- Once the box is completely dry, create a funnel by curling a piece of paper and inserting it into the opening of the PhotoBox. Pour 2 cups of sand in and move the funnel to the right and to the left while you pour to achieve a hill effect in the sand.
- To insert the photo, cut to size, curl and insert it into the opening at the top of the PhotoBox. Drop addition shells if you like in and around the photo if you desire.
- Return the shell embellished cap to the box and admire your handy work.
Coastal-Inspired Terrarium
This seashell craft is fun and easy to maintain! Terrariums are a stylish way to add some coastal charm to any area of your home and put those vacation memories out on display for all to see.

Materials Needed:
- Large clear glass container or vase
- Decorative Sand
- Seashells
- 3-4 small air plants
Directions:
- Pour your choice of decorative sand into the container of your choice to make your base.
- After smoothing out the sand, start placing your seashells around the outer band of the container. Get creative by painting a few seashells or mixing large and small shells together.
- You’re ready to add your air plants or succulents if you choose. Arrange them in the center of the container and you’re done! Easy as 1-2-3.
Bonus Tip: Add in other small beach-themed objects like sea glass, a small souvenir from one of the Emerald Isle shops or make your own sand fence using popsicle sticks.
Seashell Mirror
Another fun seashell craft project that is a breeze to make and can be cherished for many years to come is a Seashell Mirror. Customize your own mirror frame by mixing and matching your favorite seashells until you get your desired look. Your seashell mirror will add a coastal touch to any room and give you one more way to reminisce about past beach vacations.
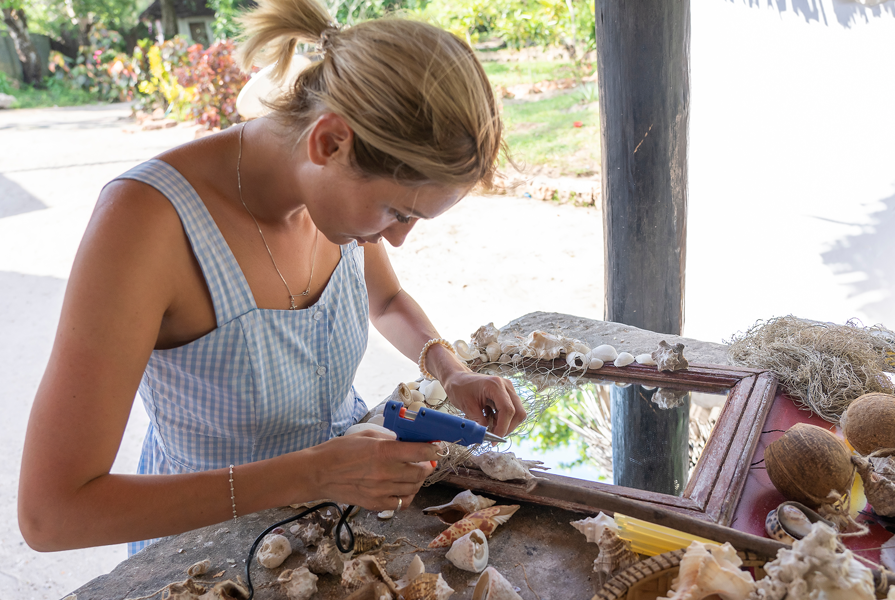
Materials Needed:
- Framed mirror
- Hot glue gun and glue sticks
- Seashells
- Stiff paintbrush
- Straight razor
- Window cleaner
- Cloth or paper towel
Directions:
- After preheating your hot glue gun, work from the inside of the mirror frame and apply glue in small sections and press shells into the hot glue.
- Hold in place until glue cools, shells can be placed at random or in a pattern.
- Continue to apply glue in small sections, pressing various sized shells into the glue. Use small shells to fill in gaps between larger ones. Save large, decorative shells to apply last, so they will stand out better.
- Glue guns tend to leave strings of glue behind so in order to remove them, gently sweep these off using a stiff paintbrush and use the straight razor to remove glue from the mirror surface.
- Wipe down the mirror with window cleaner and hang.
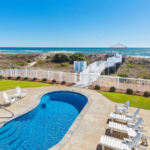
We love these seashell craft ideas and hope you do too! Don’t miss out on some excellent shelling opportunities for your next DIY project during a visit to Emerald Isle. Browse from over 700 vacation rentals and book your next getaway to the Crystal Coast!
You May Also Like:
Best Shelling Beaches in North Carolina’s Outer Banks
Pin it for later
If you enjoyed this article, share it with your friends on Pinterest!